Welcome to the first pull workout for the Ultimate Push-Pull Workout Leg Series. In this blog, we’re discussing six pulling exercises that target the back, rear delts, and biceps. In the coming blogs, I’ll be taking you through the rest of the push-pull leg workouts.
After posting my last push-day blog, a few people asked what the difference is between this new push-pull leg series and my previous programs from 2018 and 2021. The main difference is that both of these previous programs were power-building routines, so they were focused on both strength and hypertrophy more evenly.
This new routine is much more body-building focused. This means we'll be doing more exercise variation, including a bunch of new exercises and more novel intensity techniques than we did before. In addition, while doing plenty of body-building work, we’ll be using what I call a minimalist approach to the squat, bench, and deadlift, doing just the minimum volume required to make progress on those lifts.
For those of you who do care about strength, there is some strength work in this program, but it’s very minimal. For people who want to make it even more body-building focused, I offer substitution options for the powerlifts. So, let’s get right to it.

After a quick five-minute warm-up on the treadmill or StairMaster, about 10 arm circles per side,and 10 cable external rotations per side, we’re kicking things off with our first exercise.
EXERCISE 1 OF 6: LAT PULLDOWN - 4 FEEDER SETS x 10 REPS
The idea of the feeder set is something I learned from my great mentor John Meadows. We used to often do this together when we trained. It’s basically a way of warming up that has you doing four or five feeder sets, gradually building up in weight until you get to one all-out set to failure.
For your first feeder set, you’ll pick a light weight and do it for 10 reps. This should be very low exertion at an RPE of four or five, just meant to get the blood flowing. Then, you’ll rest for a minute or two, increase the weight somewhat into another 10 reps so that you’re up to an RPE of six or seven. It should be getting harder with each set. Rest for another minute or two, increase the weight again, and do another 10 reps, putting you at an RPE of seven or eight. On this set then, you’d have two or three reps left in the tank. Next, you’ll increase the weight one last time and try to get 10 reps, this time going all the way to failure (RPE 10).

The argument you’ll hear against doing feeder sets is that they end up fatiguing you for the main working set. Some might argue that it’d be better to do a shorter warm-up with less sets and reps so you get to the working sets faster.
This is the approach that I also take on most exercises, especially when I’m trying to overload with more weight. However, on a more mind-muscle connection-based exercise like a lat pull-down, where many people struggle finding a good mind-muscle connection with their back, I find that feeder sets can accomplish a couple of things.
- It helps you get into a BETTER GROVE with the movement. By the time you reach the failure set, your lats are engaging much better.
-
It directs you in finding the RIGHT WEIGHT for the failure set because you select the weight for that set based on how hard the feeder sets felt.
For example: If your third feeder set already feels pretty heavy, you know you won’t need to add much weight for the failure set. On the other hand, if your third feeder set still feels pretty easy, you know you’re strong on this day and should bump the weight up for the failure set.
EXERCISE 1 CONT.: LAT PULLDOWN - 1 MORE FAILURE SET + 30% DROPSET
Once you’ve completed that first failure set, rest for two or three minutes and do one more set to failure. Challenge yourself to reach the same number of reps as performed on the first failure set with the same weight. However, realize that because of fatigue, it’s not always possible. Oftentimes, I’ll end up getting seven or eight reps for the second failure set. After that, I’ll do a mini dropset by stripping the weight back by about 30 percent and cranking out four or five more reps.
I like doing this at the end just to make sure the back fibers are in fact reaching very high levels of activation. With the lat pulldown in particular, you might reach technical failure, but find that your back could probably still do quite a few more reps if you just cheated a little bit. So, rather than cheating, I compensate by doing this mini dropset to really finish things off.
Note in the picture below how I use a middle overhand grip at about 1 to 1.5 times shoulder width here.

When doing straight sets, I’ll often use a different grip width for each set. However, because the entire point of the feeder sets is to get in a good groove and establish a strength baseline, I’d rather keep my grip consistent from set to set. The middle grip is usually the sweet spot because if you go too wide, you’ll shorten the range of motion, but if you go really close, the biceps tend to take over a bit more.
I’d also recommend using straps on your failure sets. This ensures your grip strength won’t limit the number of reps your back can do. I also find that most people are able to feel a much stronger mind-muscle connection when they strap in. If you don’t have straps, I’d recommend at least using a thumbless grip, which in my coaching experience, is one of the best cues for helping people engage their backs better.
Interestingly, I’ve noticed many of the IFBB Pros who train at my gym aren’t super stiff and upright when they train. I think this is a good thing. When I allow my body to move more naturally and be more fluid within reason, I can feel the target muscle working so much better than if I’m very stiff and uptight. With this reasoning, on exercises like this, I think it’s okay if you allow yourself to lean and rock a bit, as long as you’re feeling the target muscle pulling and stretching under control, especially on the negative
EXERCISE 2 OF 6: OMNI-GRIP CHEST SUPPORTED ROW - 3 SETS x 10-12 REPS
Omni-Grip just means that you’re using a different grip for each set. For the first set, use a wider grip. On set two, adjust by using a slightly closer grip. Finally, on the third set, use either a neutral or under-a-hand grip.

I’m using this PANATTA chest-supported machine at my gym, but you can use any chest-supported machine that you feel working your back well. A simple T-bar row works well. If you don’t have machine access, you can simply do a Helms row with dumbbells, bracing your chest against the back of an incline bench.
In my opinion, every pull day should have at least two main types of exercises.
- Vertical Pull
- Horizontal Pull

While both exercises will hit the entire back to a substantial degree, the lat pulldowns will emphasize the lats and teres muscles, while the rows will emphasize the traps and rhomboids of the mid-back. This is especially guaranteed if you focus on actively squeezing your shoulder blades together.
To summarize again, use three different grips for each of the three working sets. Because the back is so complex and is made up of so many different muscles, varying grips will pull on the skeleton in slightly different ways.
EXERCISE 3A: BOTTOM-HALF DB PULLOVER - 2 SETS x 10-12 REPS
EXERCISE 3B: STATIC LAT STRETCH - 2 SETS x 30 SECONDS
The essence of this pairing is to do a set of pullovers, stretch your right lat for 30 seconds, stretch your left lat for 30 seconds. Following a 30 second rest, do a second set of pullovers, then stretch your left lat for 30 seconds, stretch your right lat for 30 seconds, and move on to the next exercise.

Note here, that we’re switching the order of the side we’re stretching first on each of those supersets.
I’m calling these bottom-half pullovers because we’re completely cutting out the top half of the range of motion and simply staying in the more lengthened stretch aspect of the lift. This is because there’s virtually zero tension on the lats at the top.

I’m not sure if you’re aware of this ongoing debate, but the pullover has been recently added to the chopping block of exercises in a lot of online coaching. Some coaches have been arguing that because the lats don’t have the best leverage with the arms positioned overhead, the pullover is probably not a very good exercise choice for the lats. However, just because the lats aren’t optimally leveraged with the arms overhead, doesn’t mean that they can’t still experience stretch and tension. As long as the bulk of the muscle fibers are behind the active joint, which they are in this case, they’ll still have some leverage on that joint.

For two very simple reasons, I still like the dumbbell lat pullover as a stretch-type exercise for the lats.
- I always feel a great stretch on my lats when I do them.
- My lats are always sore for a day or two after doing them.
Either of these reasons isn’t ideal for determining exercise selection on their own, but when they line up over years of training, I think they’re perfectly reasonable proxies for muscle activation.
Of course, the only way to really know if the pullover is a good lat exercise would be if we had a longitudinal hypertrophy study done across several months where researchers measured the lat thickness of a group doing pullovers versus the lat thickness of a group not doing pullovers. But as far as I’m aware, that study doesn’t exist. So, until that study is conducted and potentially proves me wrong, I still think lap pullovers are a solid option to include.
As for the stretching, I do one lat at a time by just grabbing onto something solid and leaning my hips back until I feel a nice deep stretch all along one side of my back. I’ll hold that stretch for 30 seconds at a 7 out of 10 intensity. That is, just before the feeling of pain or discomfort. I’ll then switch and do the other side.
I shared about the benefits of inter-set stretching in my last push-day blog, so if you didn't catch that one, please check it out.
EXERCISE 4 OF 6: OMNI-DIRECTION FACE PULL - 3 SETS x 12-15 REPS
Omni-direction just means that we’re pulling from different directions on each set. On set one, position the cable low, and pull from low to high. On set two, position the cable at shoulder height and pull more or less straight across in the middle. For the final set, position the cable high, and pull it down toward the eyes.

Again, this goes back to the concept of the back being a complex web of different muscles and so, while it is true that a vertical pull and a horizontal pull are the only two movements you really need to grow your back, I think that if we’re trying to maximize back development, hitting things from a variety of different angles is likely more optimal.
EXERCISE 5 OF 6: EZ-BAR BICEP CURL - 3 SETS x 6-8 REPS
I’ve noticed that many people neglect lower-rep bicep work and just aim for the pump and mind-muscle connection. However, I think including a bit of both is important. To accomplish this, use some fairly heavy weight and focus on progressive overload in a low to moderate rep zone. You can treat this more like you would a bench press or deadlift where you track the weights you’re using over time and make sure that either the weight or the number of reps you’re hitting is increasing from week to week.
Obviously, it’s important to keep your form consistent, but a little bit of hip drive on the positive (to get the bar moving) is okay, as long as you’re controlling the negative on each and every rep.
EXERCISE 6 OF 6: BOTTOM-HALF DB PREACHER CURL - 2 SETS x 10-12 REPS
In exercise six, you’re doing partial reps in the stretched aspect of the lift only. I decided to include these here, based on the results of the 2021 study from Sadle and Colleagues.
The researchers split 32 subjects into one of three groups. One group did only the bottom half of their preacher curls, curling from 0 to 50 degrees of elbow flexion. Another group did only the top half of their preacher curls, curling from 80 to 130 degrees of elbow flexion, while the third group was a control group. they didn’t train at all.

After five weeks, the bottom half group saw more than twice the gains in muscle thickness than the top half group, indicating that the lengthened, stretched aspect of preacher curls is the more hypertrophic part of the lift.
In the study, the authors highlighted a bevy of literature pointing toward the idea that training a muscle at longer muscle lengths is very important for muscle growth.
I suggest doing one side at a time. I start with my weaker arm and then match the reps with my stronger arm. This is good for preventing any little bicep asymmetries from developing. In addition, it helps me focus on really feeling the stretch and mentally focusing all the tension to one bicep at a time.
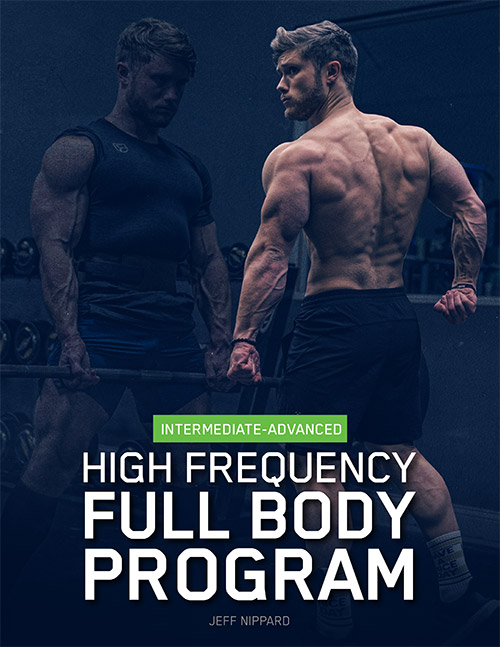
If you’d like to have the entire push-pull legs program all in one place, so that you can just go to the gym and run it, you can pick up the full 12-week ultimate push-pull leg system over on jeffnippard.com.
In terms of how it’s structured and sequenced across three distinct phases of training, I think it’s my most interesting program to date. It’s definitely my most body-building focus program to date as well.

There’s also a 4-day, 5-day, and 6-day per week version of the program available, depending on how many days per week you can train. If interested, you can check out the further information and links below.
https://jeffnippard.com/products/the-ultimate-push-pull-legs-system
A summed-up video of this blog is also available on my YouTube channel.
That’s it for this one, guys. Thank you so much! I’ll look forward to chatting with you here in the next blog.
References:
Biceps ROM Study: